

Overview
Connect GWI Spark MCP to Google Gemini Enterprise as a custom MCP server data store. This guide uses the v1 production MCP endpoint. Reference: Google — Set up your custom MCP server data store Terms (Google): data store ≈ connector · MCP tools ≈ Gemini actions.Who this guide is for
Most of this page is for organization admins who set up GWI Spark MCP in the Gemini Enterprise console once for the whole company. That includes OAuth credentials, creating the data store, enabling actions, and connecting the data store to your Gemini app. End users (people who chat in Gemini Enterprise) don’t need to repeat the admin setup. Once an admin has completed the setup in the Gemini Enterprise console, each end user only needs to authorize the connector with their own GWI account and activate it in chat. If you’re an end user and your Gemini Enterprise admin has already completed the setup, you can skip ahead to:How to use this guide
Admins: follow the steps below in order.- Open Google’s setup guide side by side with this page.
- Complete each step in the Gemini Enterprise console from Production values through Connect the data store to your Gemini app.
- When a form asks for URLs or OAuth settings, copy from the Production values table below.
- Screenshots show the UI at each step.
Admin setup (one-time)
Production values
Setup walkthrough
Follow the steps below in the Gemini Enterprise console. They mirror Google’s setup guide; when a form asks for URLs or OAuth settings, use the Production values table above.Create the custom MCP server data store
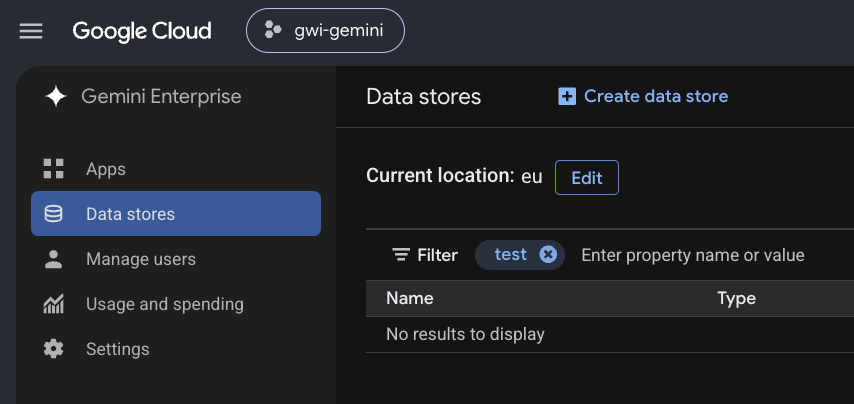
Maps to Google: Create the custom MCP server data store.1. Data stores list
- Gemini Enterprise → Data stores
- Confirm Current location (for example
eu) — edit if your org requires another multi-region - Click + Create data store
2. Select source
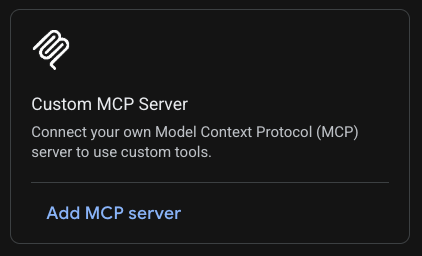
- Search sources → type
Custom MCP Server - On the Custom MCP Server card → Add MCP server
3. Authentication — OAuth 2.0
- Select OAuth 2.0
- Fill the form from Production values (table above).
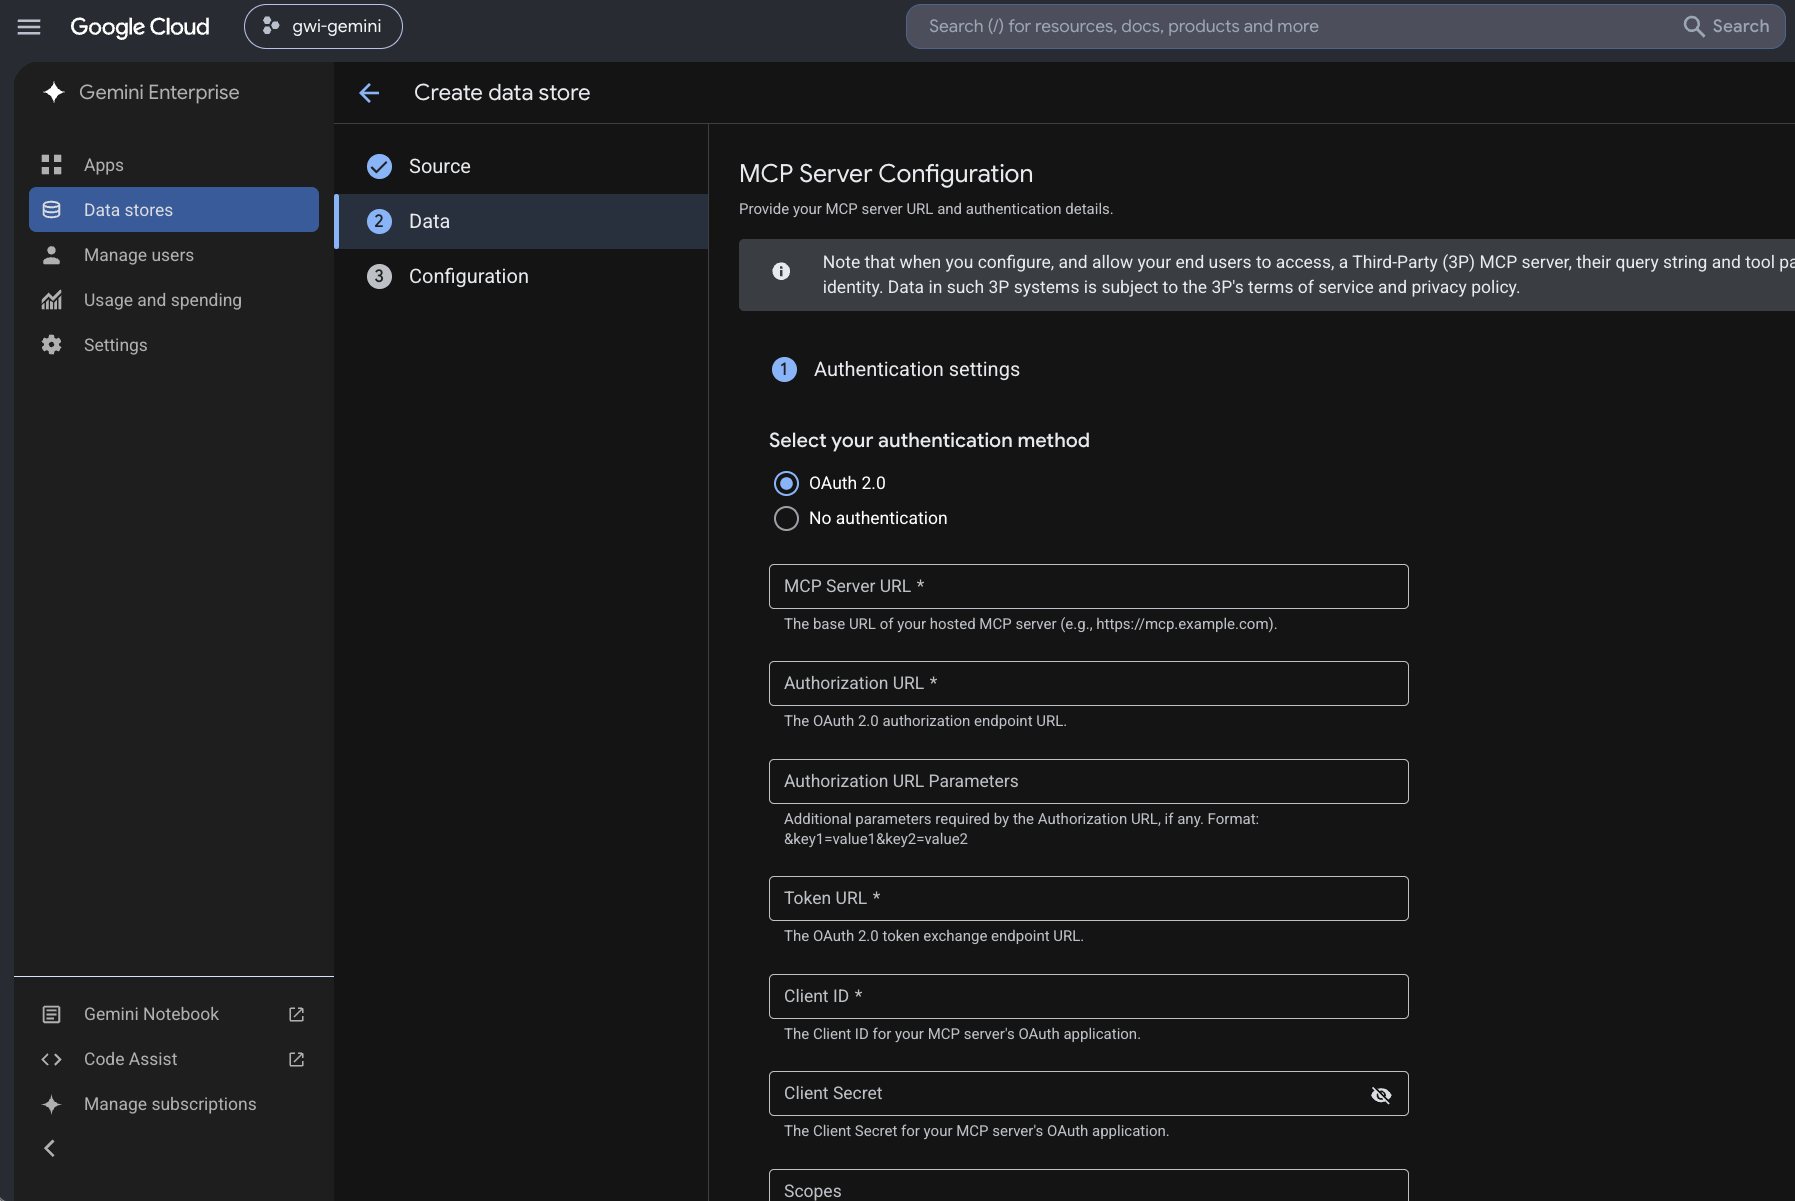
- If Enable PKCE Support appears → leave unchecked
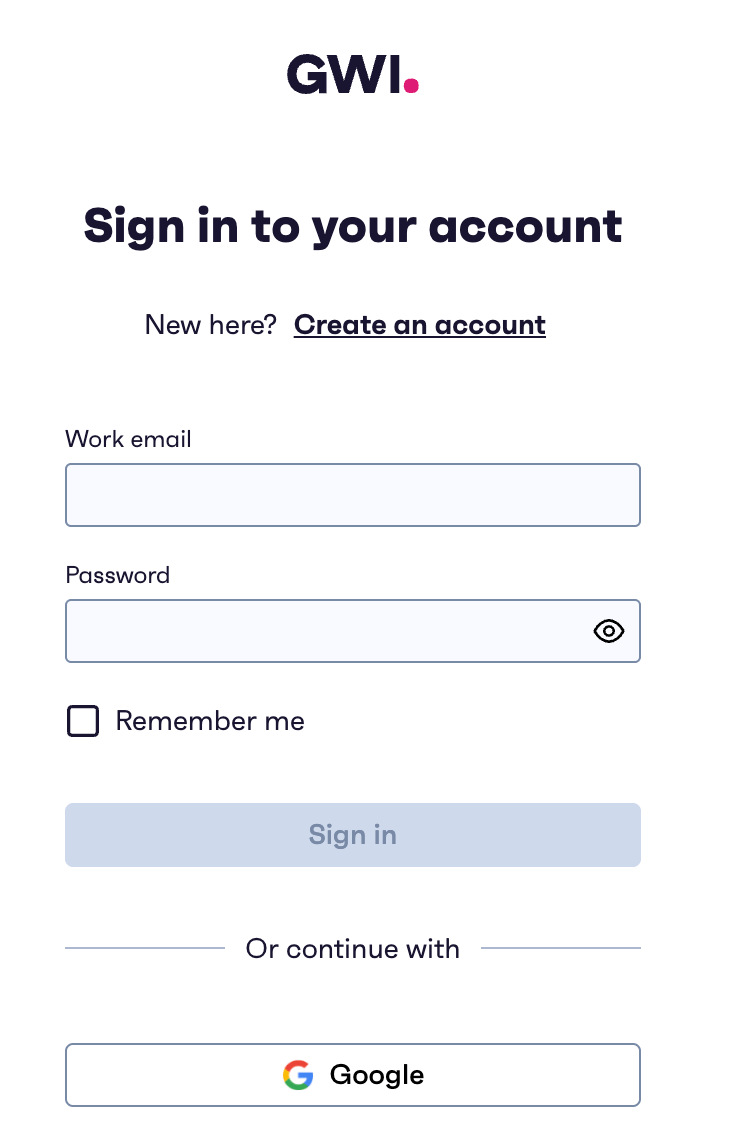
- Click Verify Auth
- A GWI sign-in popup opens → sign in with your work account
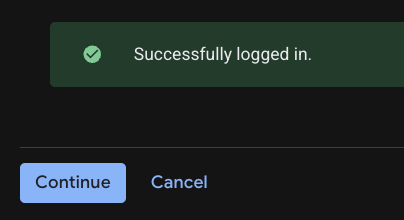
- Expect Successfully logged in. → click Continue on that success panel
- Back on the MCP form → Continue (wizard)
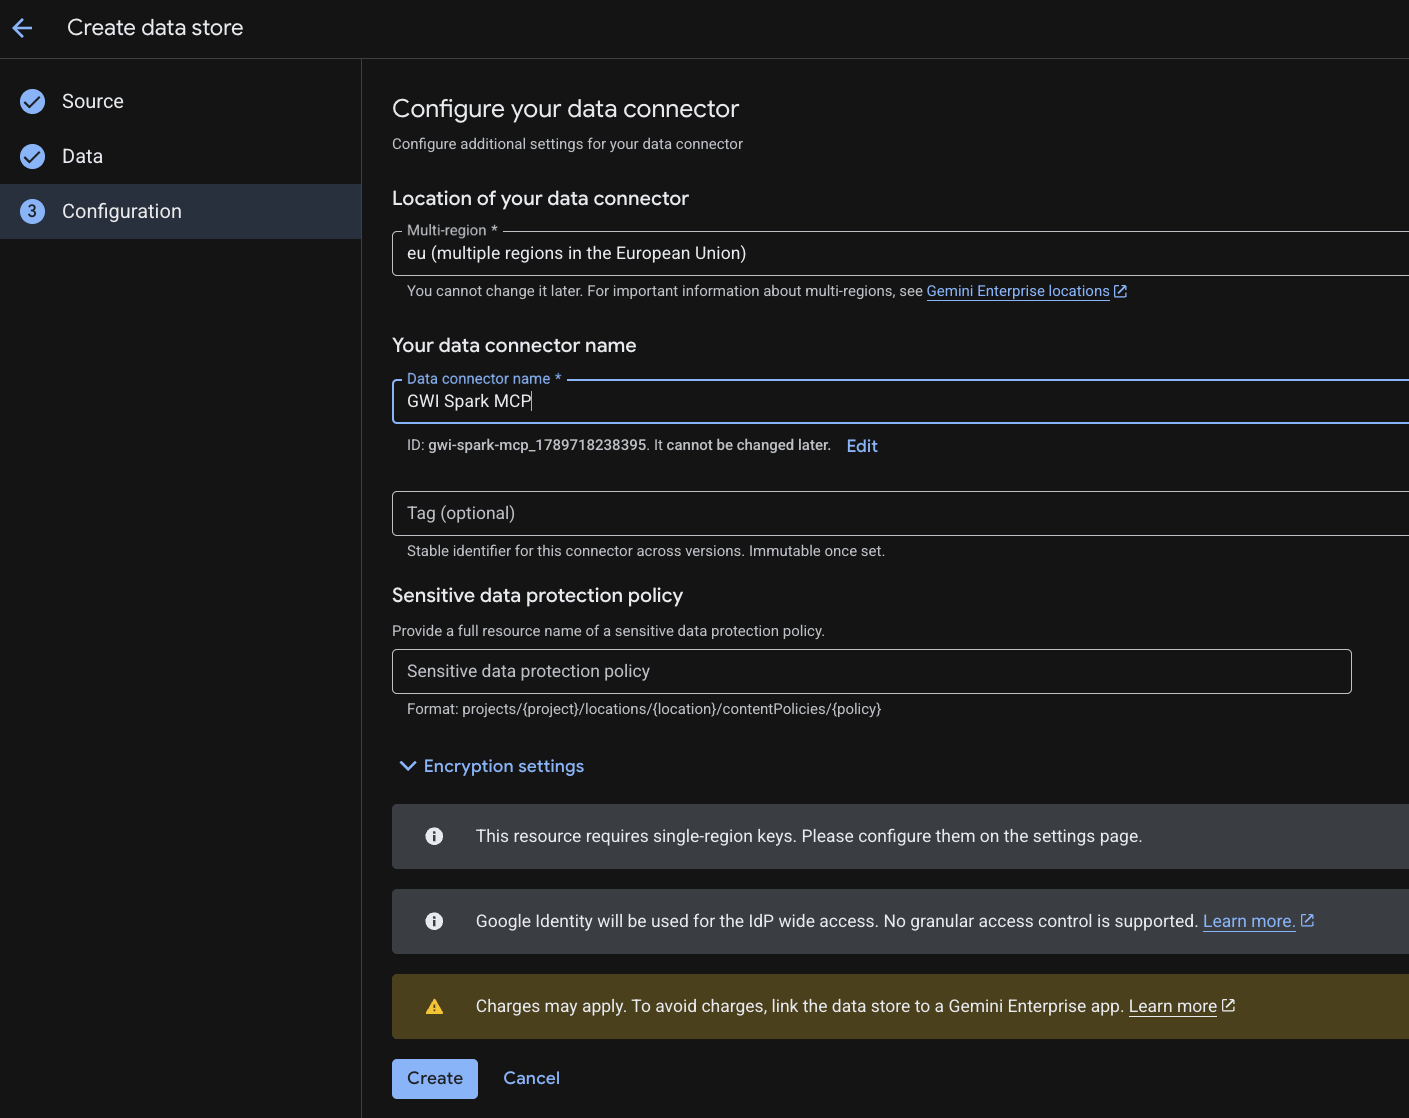
4. Configure your data connector → Create
- Multi-region / Location — pick the location for this connector (for example
eu). Cannot change later. - Data connector name — the name you’ll use to recognize the connector (for example
GWI Spark MCP) - Tag (optional) — stable identifier across versions; immutable once set
- Other optional fields (sensitive-data policy, encryption) — leave unless your org requires them
- Click Create
- Wait until the data store state is Active (Creating → Active)
5. Wait for Active, then enable actions
Maps to Google: Enable actions. After Create, open the data store. Connector state may show Creating briefly — wait until Active.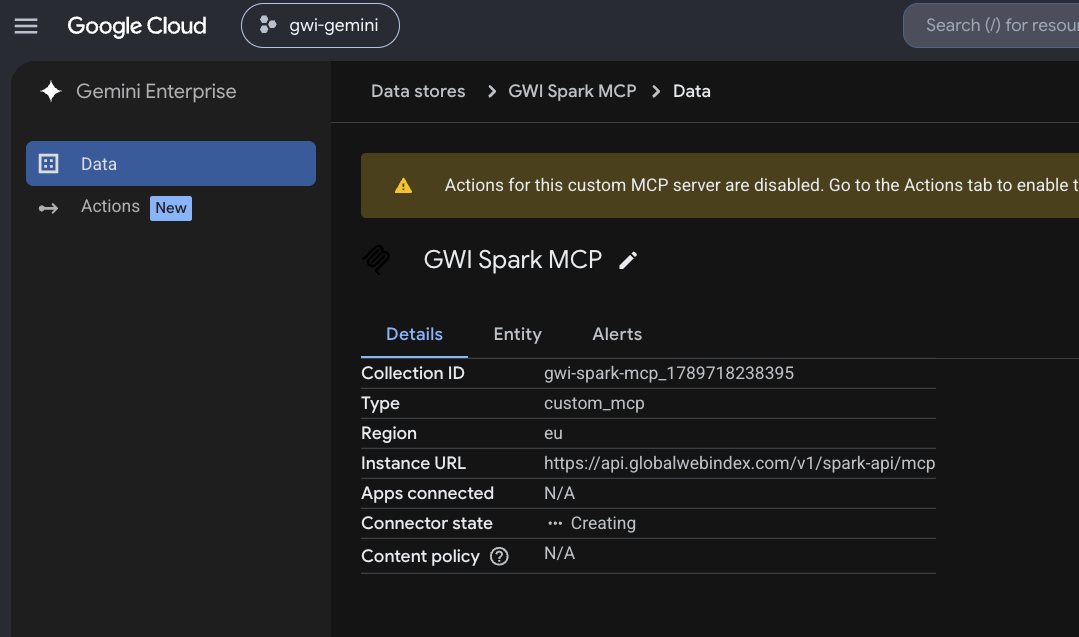
- Left nav (or banner) → Actions
- Reload custom actions (reauth /
tools/listif prompted) - Select the actions (tools) to enable — Google limit: up to 100 at a time
- Enable actions

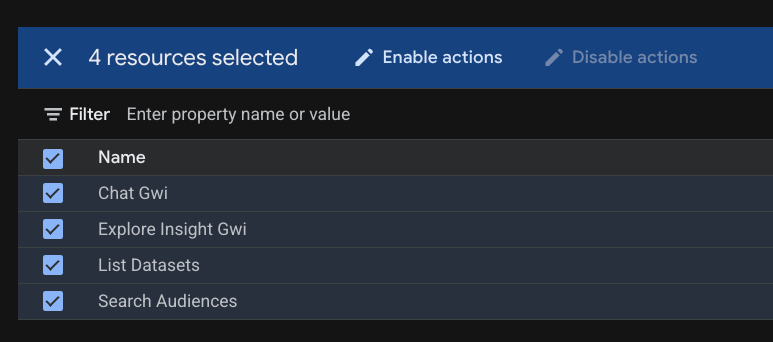
Available actions may differ from the screenshot at any time as GWI updates Spark MCP. After Reload custom actions, enable all listed actions so the connector behaves as expected in chat.
Connect the data store to your Gemini app
Creating the data store is not enough — it must be linked to a Gemini Enterprise app. Maps to Google: Connect a data store to an app.6a. Create an app if you don’t have one
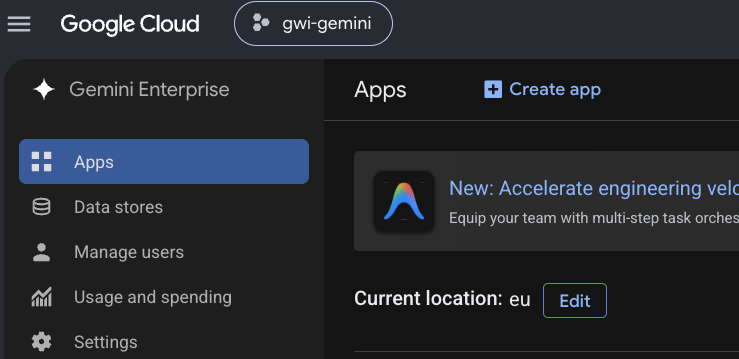
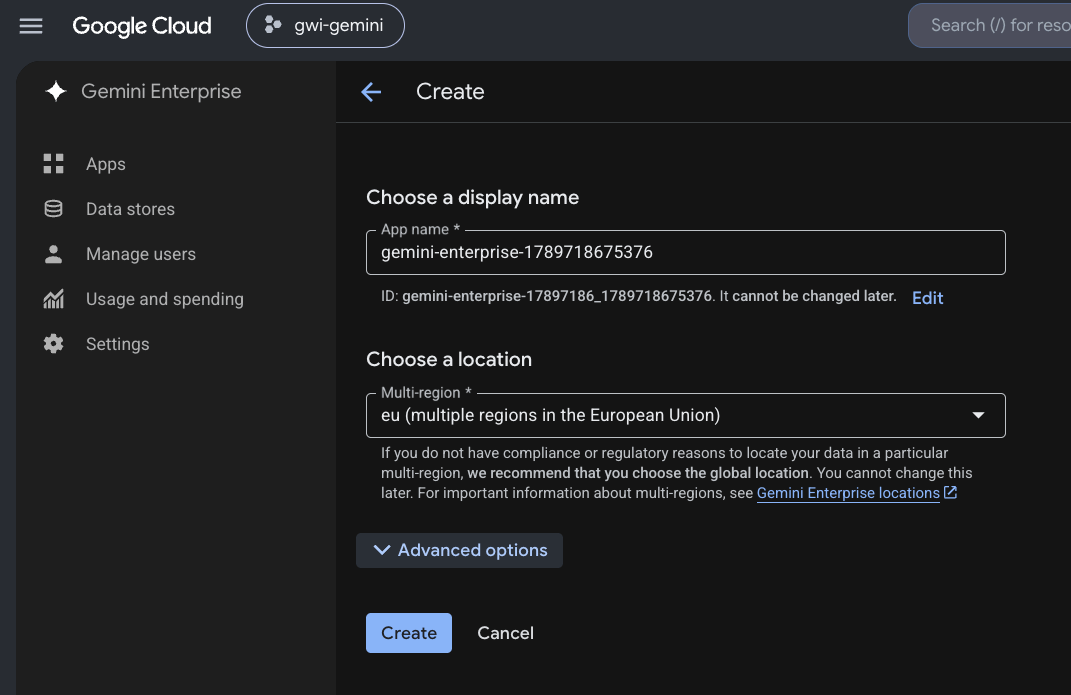
- Gemini Enterprise → Apps → + Create app
- Set display name and location (same multi-region as the data store if possible, for example
eu) → Create
6b. Connect the existing Spark MCP data store
- On Apps, find your app → under Connected data stores click view
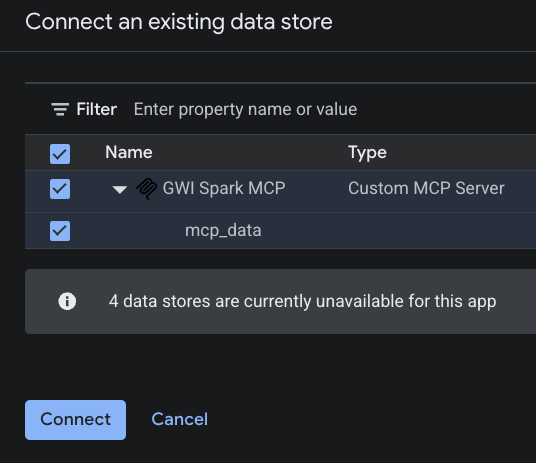
- Add existing data stores
- In Connect an existing data store, select GWI Spark MCP (Custom MCP Server) → Connect
- You should see GWI Spark MCP · Custom MCP Server · Active



End users — start here
If you’re an end user and your Gemini Enterprise admin has already completed the setup, use your own GWI account in the steps below.Authorize and activate the connector (first use)
Maps to Google: User authorization. Required before tools work in chat.- Open the Gemini Enterprise web app (URL from the app overview)
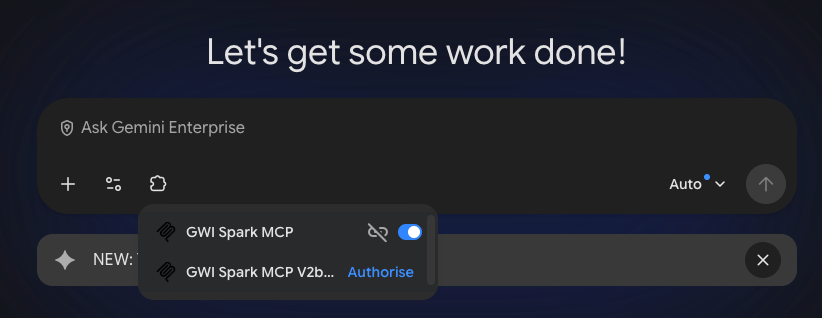
- In the prompt bar, open the connector/tools control (near
+) - Find GWI Spark MCP — if it shows Authorise / Authorize, complete GWI sign-in
- Switch the connector toggle on (activate)
Using the connector
Maps to Google: Authorize your connected services. Once connected, authorized, and toggled on:- In Gemini Enterprise chat, make sure GWI Spark MCP is active (connector/tools panel)
- Ask in natural language and name the connector if helpful, for example:
Using GWI Spark MCP, give me insights about pet owners and their shopping habits. - The assistant should call enabled actions and answer with sources